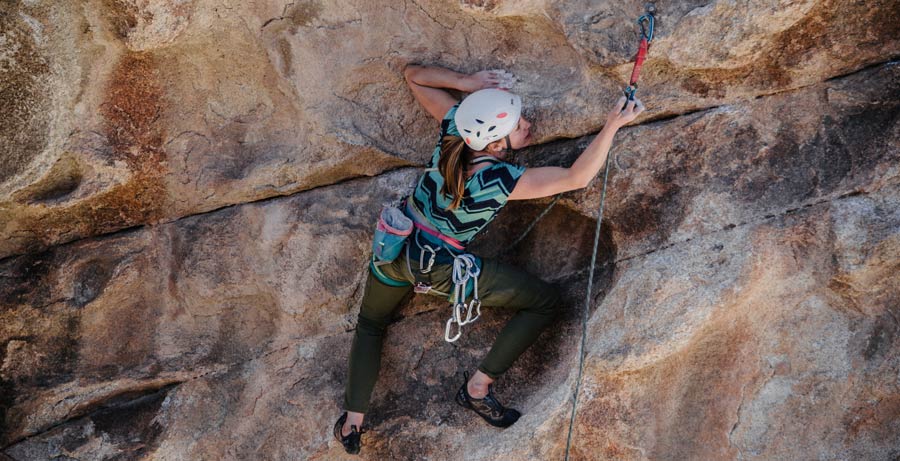
This week, I want to focus on why I chose lead climbing, clipping techniques, and an update on my progress so far.
First of all, lead climbing is an incredible form of climbing. It’s a mix of bouldering and top roping, which means that while the climber still exercises every bit of technique and strength they have, they also have to implement their endurance skills. While top rope and bouldering (other forms of climbing) are all a big part of the climbing world, a big thing is that lead climbing allows for independence.
When it comes to outdoor climbing, lead climbing becomes necessary in order to be able to enjoy the crags outside (or else you’ll have to rely on another person forever!). Anchor systems for top roping can often only be built via a person lead climbing up a rock wall and building that anchor. In my outdoor climbing experience, I have only been able to do a few routes that allow me to hike around and set up the anchor system from the top. If there are routes that require lead climbing, I haven’t been able to do them. By learning to lead climb, I have the option of doing most of the climbs outdoors and I don’t have to miss out on them.
In climbing, teamwork makes the dreamwork. If you don’t have an attentive, experienced partner, your life is on the line. Literally. Lead climbing is a two partner dance between the climber and the belayer, and theres a lot of trust that has to be secured when lead climbing. Fortunately, I have an epic lead climbing partner (Steph!) and I am so stoked to see how far we progress and grow together. This past week, we have already crushed some of our things on our to do list. We went to CragX and learnt how to clip as we would while lead climbing up a wall. We first started on the ground, learning the techniques and hand movements that allow for safe clipping. Then, we climbed some easy climbs top roping, but at the same time using a tag line (a short rope that attaches to the climber) to practice our lead climbing. Clipping wasn’t too hard, but it definitely takes a while to get used to. It definitely put into perspective how much practice this process will take.
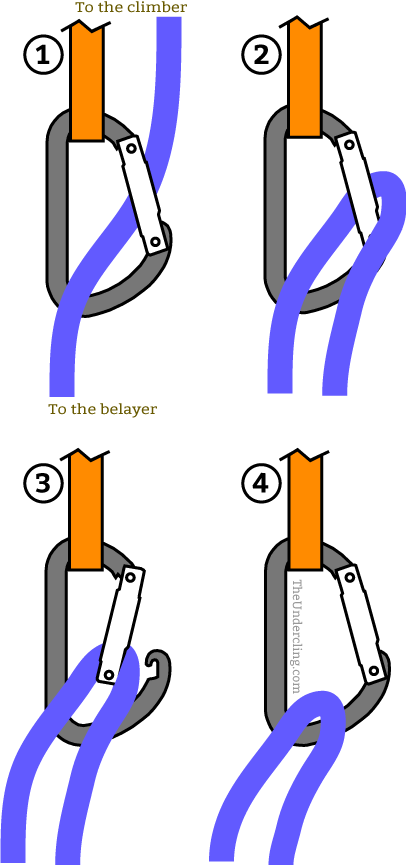
Proper clipping: When clipping into a carabiner, the rope must always go under and AWAY from the rock (as demonstrated by the diagram on the right). If the climber clips in like the diagram on the left, if they fell, the rope has potential to unclip the gate. This would mean the fall would be of great distance because that clip is no longer assisting the climber.
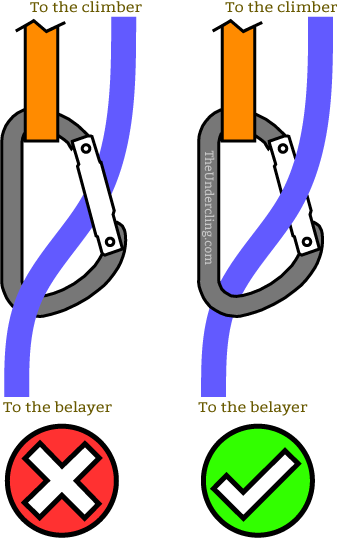
What happens when you back clip:
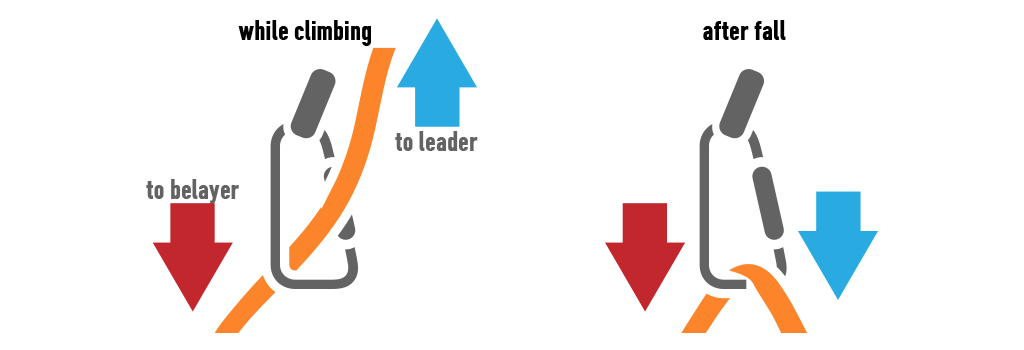
Proper clipping allows for a fall to be caught, as demonstrated below:
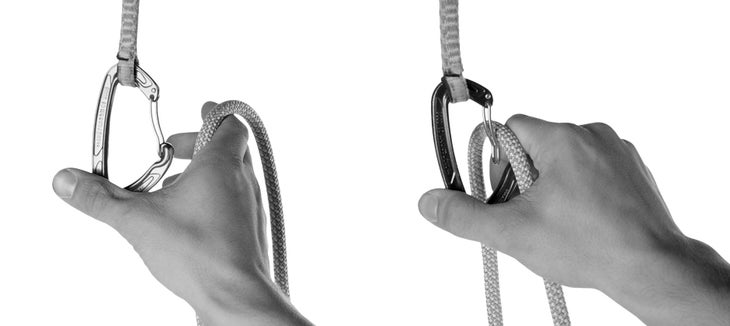
There are two types of clipping that we learnt. Each method of clipping can be done by either hand, and should be done with both hands as to practice and be able to clip in whatever way the carabiner is. Choosing which hand and method to use is completely dependent on the direction of the carabiner and the gate (the open/close portion of the carabiner).
Method 1: Pinch Clip Technique – same sides (right hand and right facing gate, left hand and left facing gate).
For this method, put your hand in a finger gun position and let the rope run over your pointer finger. Steady the carabiner with your thumb, and push the rope through the gate with your fingers.
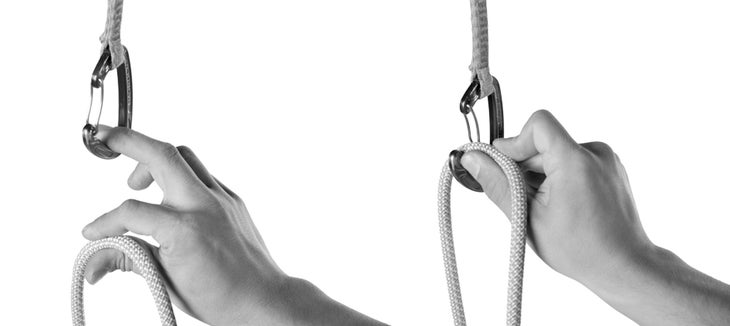
Method 2: Snap Clip Technique – opposite sides (right hand and left facing gate, left hand and right facing gate).
For this method, grab the rope and hold it in a pinch position. Hold the carabiner with your middle finger to steady it, and snap the rope in.
Some Extra Fun:
On Friday (September 31st, 2022), Steph and I and a couple other girls went to Nanaimo River to outdoor climb. This gave me a huge insight on how lead climbing opens up so many opportunities for climbing. Many of the routes required the setting up of an anchor through lead climbing up the wall as there was no way for someone to hike around and set up the anchor system without falling. This definitely gave me motivation to work hard to achieve my goal. Lead climbing is definitely much scarier than top roping, but mastering the part that I’m afraid of (falling) will be so worth it once I am able to lead up a rock wall. We managed to top rope a couple routes on a crag called the Sunny Side – the views at the tops of the climbs were well worth the heat (hence the name) and the struggles of that rock face as we looked over a portion of the Nanaimo River.
